
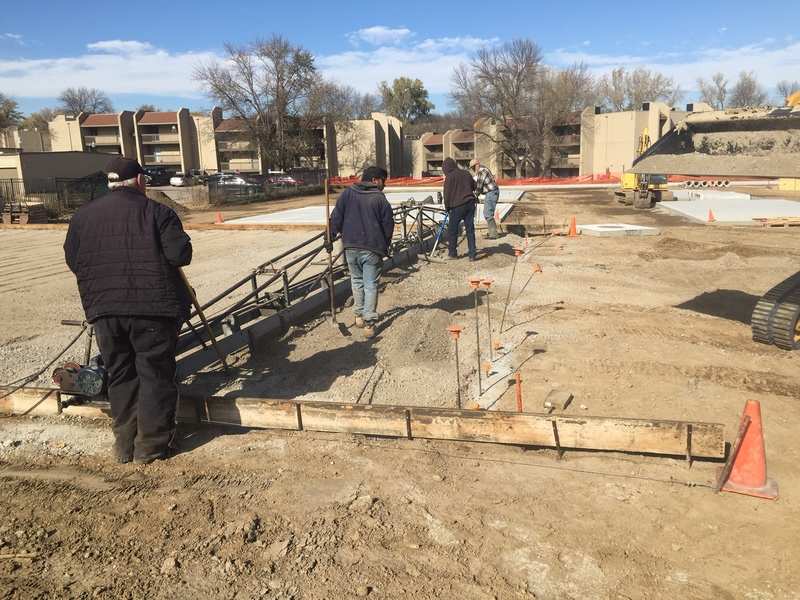
Self Storage- Building Pads
SELF STORAGE- BUILDING PADS
Listening to an Allie Sherlock buskering tune at minus 14 degrees, thought I would knock out a post.
You liked the post on Driveways, so we will go with Building pads since you’re interested in concrete.
Pad specs: Basically however engineered and Building codes designate.
-Thickness 4 inches concrete
- crushed concrete or grit substrate, compacted 4 inches
-PSI 2,500; with 3,000 recommended. This is the strength of the concrete and how much surface weight it can take.
-Surface finish, smooth. Whereas your roads were brushed for traction. You can do this with concrete floats or power trowels.
- Ask them to use edge trowels to smooth the edge versus leaving a sharp edge. Just a nice safety touch, not needed structurally.
Rebar:
- 6x6 welded wire fabric, recommended. My contractor and I don’t like because it comes in a Roll and tends not to straighten out. As you put concrete over it, its hard to keep it off the bottom.
- Rebar, used ½ inch on 3 foot by 3 foot centers. Our contractor for the straight bars started using fiberglass versus steel rods. Lighter weight and easier to work with. Costs a little more. Doesn’t rust, so you don’t have to worry about the concrete not bonding to rust. Use steel on the footings for the curve.
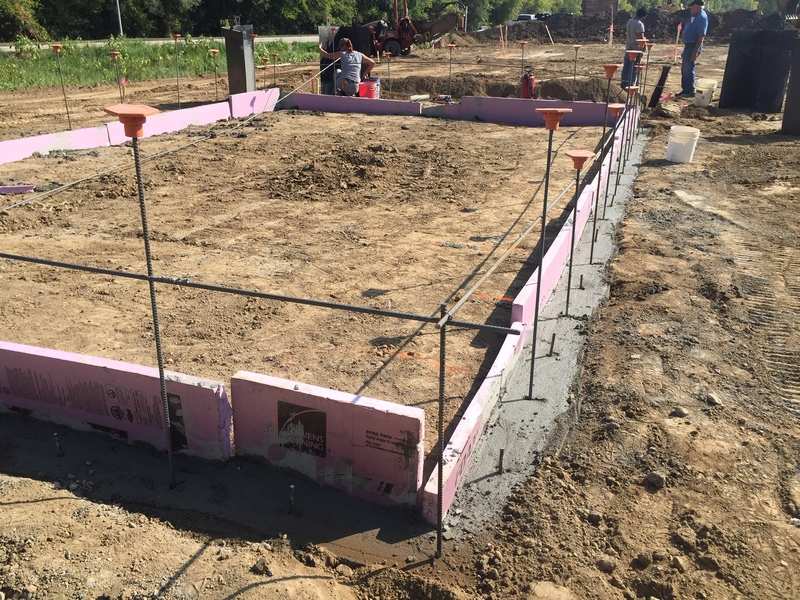
Footing specs: Basically however engineered and Building codes designate.
-This is tricky. The majority of your building manufacturers engineer a “Floating” slab without footings. The concept behind this, since the buildings are not heated or cooled, then the pad will “Float” with the temperature changes since the heat or primarily freezing will be evenly dispersed both on the exterior and underneath the pad. Majority of Zoning entities will allow a floating slab since not heated/cooled. However some will require footings since the building could be tore down and switched to an alternative usage (heat/cooled).
- Footing Thickness. Tricky part. If the manufacturer didn’t engineer or design a frost free footing and the Building authority doesn’t set Footing Thickness, since they are not engineers, what thickness do you use? Basically you pick one and have your manufacturer write it into the drawing specs. We picked 6 inches because our equipment was set to that width. On the office since we were required to put 2 inch Styrofoam insulation, we had to make the footing 8 inches wide.
Weather:
-Hot; (Shaken or Stirred) Ice, once you reach about 95 degrees and high humidity, the concrete won’t “Set” properly. It will stay as “Jello” versus hardening. To keep pouring you can have them put Ice into the truck to cool the concrete down. The Lime in the concrete creates a lot of heat.
-Cold; Air temperature or Frozen Ground.
Danger- if you pour on frozen ground, which is “Expanded”, when it thaws out in the spring, your concrete will crack.
Danger- if you pour during freezing temperatures your surface may freeze and then either flake or get dimple marks in the surface.
Heat Blankets can help to both keep the ground thawed before you pour or to keep the concrete from freezing while it “Sets”.
Hot water anyone. To keep pouring during cold weather they can add hot water to the mix. But you still have to manage frozen ground or freezing air temperatures.
If the ground is slightly frozen you can use a skidsteer to skim the frozen dirt off, if you have to keep going.
-Dry; Sealer, burlap or both? If the air is dry or low humidity, your concrete can dry out too fast. The longer your concrete stays “Wet”, the stronger it will be. To keep the moisture in, you can spray concrete sealant on it. This will keep the moisture in the concrete longer. And/Or you can put wet burlap netting over it and spray it down with water, until it gains strength.
Saw cutting: relief tension, direct cracks. As the concrete hardens, surface tension occurs. So if it cracks it tends to “run” across the pad. Putting saw cuts in, is to both relieve the surface tension, but also to stop cracks running across the pad and follow the cuts.
- Dry cut; you can come back and do this a day or so later.
-Wet cut; this requires different cutting blades. And then you must cut after the concrete has set, but before it dries out to much. Supposedly “Wet” cutting is preferred. A lot of crews don’t like doing this since they are just worn out from making the pour.
Cracks:
-dirt compaction. Sheeps foot, Vibratory compactor, concrete trucks, bulldozers. Vibratory Sheeps foot is the best for compacting soil. The sheeps foot, applies more of the weight to a smaller point. The vibratory, makes the soil settle more, while applying the pressure.
-“LIFT”- how much fresh dirt to add before compacting that level of dirt. 6 inches deep. Please don’t try this, but it is my understanding you can put something under 12 inches of fresh dirt and a Bulldozer or tank driving over will have not impact below the 12 inches.
- consistency of dirt type, Sand, clay, black dirt, and vegetation, will generally result in poor compaction. Sand is actually good as a substrate, but water is a better compactor for Sand than pressure. Clay is also a good material, but you can over work it and it can become watery.
- Moisture, longer wet, stronger the concrete
- Sorry to tell you, but with all of the items performed above, you will still get cracks. The dirt compaction and consistency of dirt type are the major contributors to cracking.
Floor Sweating: use clear plastic underneath pour.
Heat/Cooled building-
-Vapor barrier for floor to help keep sweating/humidity down.
-Insulation on outside of footing pour.
-Insulation under pad? You could, but the temperature of the soil normally stays a constant temperature, you might not want the expense. Especially if you want to cool the building.
-Coefficient of Expansion and heat transfer, shade exterior concrete so it doesn’t transfer the heat or cold into the building pad.
Road surface/footing requirements- rock or concrete/asphalt. If you do a hard surface road or frost free footings, then the cost of the building becomes significantly less of the total cost. Then you might as well do a wider building 15 or 20 foot versus a 10 or 15 foot unit depth. Also if you have the extra ground, give the exterior land up and don’t use it as a driving space, but do a one sided building. That way the cost of the driveway on the exterior sides is shared by buildings on both sides. Use these concepts to decide on the pad width along the outside property lines.
Edge- 1 inch dip, to keep out wind blown rain under the door.
Pad Length-
-Fire wall, not tied to office or lived in quarters. Normally a building code requirement.
-Fire sprinkler requirements. This was negotiated with us. Each city will be different.
-Fire hydrant access. If your building is solid for a continuous run, so they can’t take a hose through the middle, you might have to add more hydrants. Get the fire marshal to review your plans and building sizes.
Good luck on your Pads. If you can complete them in the fall, and then build the buildings in the spring, you will have more builders available than at the end of the season, up North. Also better dirt conditions to work with.
Please add comments and insights.
Start small and Make Your Big Mistakes Early.


Comments