
First Time Flip Gone Right - When Preparation Meets Opportunity
“Thinking too much leads to paralysis. It’s important to think things through, but many use thinking as a means of avoiding action.” - Robert Herjavec
After watching a few too many HGTV flipping shows, I decided to take the plunge into flipping (January 2019) and to leave my full-time job at the time. For many years I've wanted to complete a flip, more specifically with my father, a well respected licensed Home Inspector and Handyman.
Construction and Real Estate investing is nothing new to me. If you haven’t read my previous blog post on a garden apartment I renovated, Click Here. It explains where my passion for Real Estate came from, and gives you some insight into how I got started.
We discovered this property from an agent who wanted us to provide a quote to paint the entire townhome because the property was sitting on the market for too long. The townhome was listed for $219,000 ( 2Br 2.5Ba) and closed with a cash offer $185,000 through a hard money lender (Paid 10% interest).
Breakdown: The construction took us 3 months for the top 2 floors and 1 month to complete the basement. We were under contract within 3 weeks and spent another 5 weeks for closing on the property. For this particular deal to work, sweat equity was key. The only part of the flip that was outsourced was the HVAC replacement, hardwood flooring and quartz countertops installation.
We consulted with an interior designer who guided us with picking paint colors, floor tile and lighting fixtures, which we highly recommend.


First thing I notice between these two pictures is the beautiful Oak hardwood flooring. We decided to go with a Golden Brown stain. To balance out the darker flooring, we opted to go with a neutral paint color called Intense White, which is Benjamin Moore paint color. As you may have noticed, we removed the partition between the kitchen and dining room, providing a much more open and spacious feel. Instead of a standard 3- ¼ inch baseboard trim, we felt that a larger, white 5-1/4 inch Alexandria trim would be more elegant and would tie everything together.


When a potential buyer walks into the door, your goal is to get them excited about wanting to see more of the house. The first thing our potential buyers would see is the fireplace, so we made sure we had a wow factor. We completely customized the mantle and fed cable wiring through the wall so the new owner can install a tv above their fireplace. Originally, there was only a strip of track lighting, limiting the amount of light that can enter this large living room. Adding 6 ultra thin LED downlights drastically shifted the mood and feel, and the light bounced off the neutral paint colors quite well.


My 2nd favorite room in this flip was the kitchen.
We decided to leave the same footprint because the existing electrical and plumbing were already there which saved us time and money.
We installed White “easy close” Maple cabinets with black contemporary pull handles to balance out the white. To the left of the 36” stainless steel fridge, we installed a very necessary pantry. If you saw the pictures before the demolition, there was a partition dividing the kitchen and dining room. Prior to the flip there were no cabinets on the left wall. It felt very empty, so adding upper and lower cabinets helped fill in the extra space as well as providing more cabinet and countertop space. The white beveled subway tile gave the kitchen a bit more character than regular subway tile and was still a fraction of the price. Originally only 2 lights were installed in the kitchen (one over the kitchen sink and one in the middle). Adding 5 additional LED lights made the kitchen complete.


Upstairs we continued the same color scheme and trim throughout the upstairs replacing the carpet and installing 2 light fixtures. A few of the windows panes were in need of replacement as well.


The Master bathroom is, by far, my favorite transformation throughout this whole renovation. The prior layout had an exposed toilet (No door separating) which was not ideal for privacy. Are you wondering where the shower was? It was a standard square stand up pan shower, directly across the toilet. We took the shower out, capped the drain and walled it off turning it into a 2nd closet in the master bedroom. Not many people still use bathtubs so, we turned the bathtub into an elegant, 5ft floor-to-ceiling shower using hexagon tiles on the bottom and 12” x 24” San Giorgio Matte porcelain tile on the other 3 sides. Dual marble countertop vanities added a luxurious feel as well as providing more cabinet space for accessories. The bathroom tile was a light grey wood like plank that played off the grey and white tones.


This 2nd bathroom was freshened up with a new soaker tub (taller tub), flooring tile, vanity and beveled subway tile to go along with the kitchen backsplash.

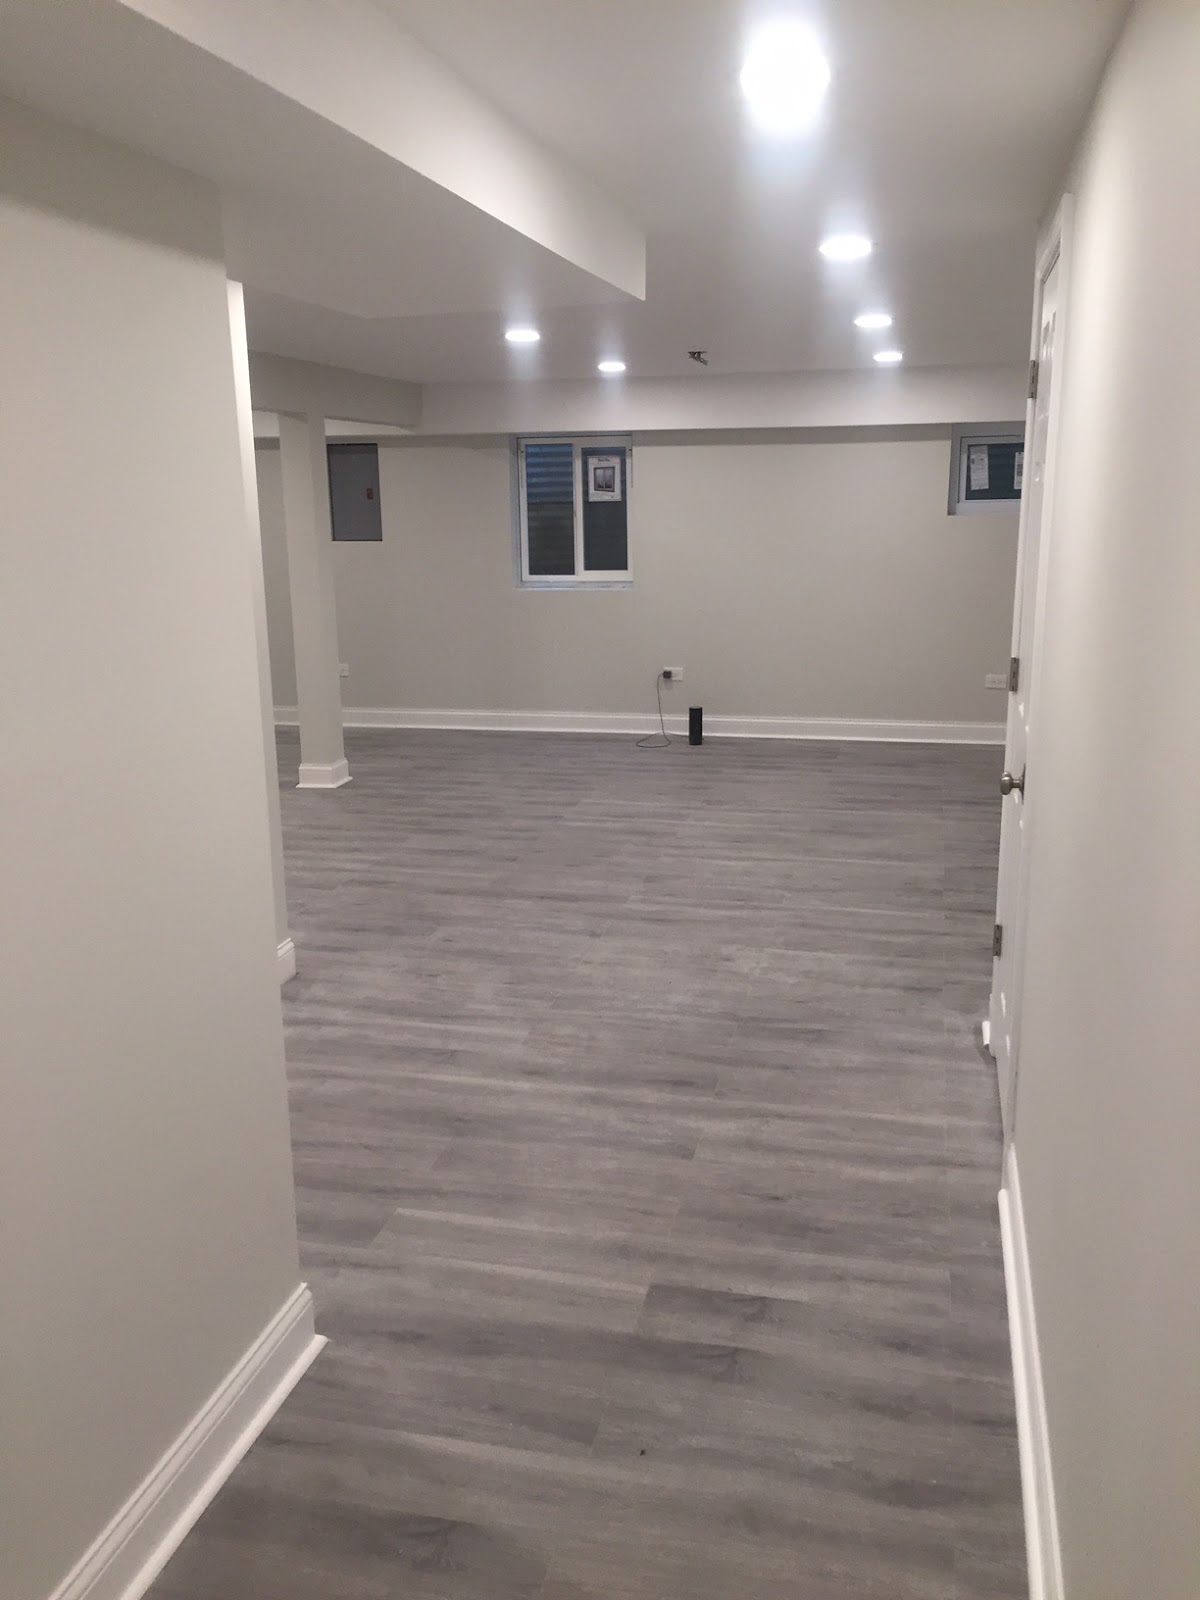
In order to get our desired asking price, we had to complete the basement. Adding NuCore White Pewter Rigid Core vinyl flooring is perfect for a basement, just make sure you put a vapor barrier between the concrete and flooring. Nucore comes with a 5 year Commercial, 15 year Residential warranty and, even better, it’s waterproof. A closet was added on the right hand side below the staircase and LED lighting was installed throughout.
This article would not be complete if I didn’t share my key takeaways and tips to pass on to you.
Key Takeaways and Tips:
- Make friends with the neighbors. This being a Townhouse flip, you are wall to wall with your neighbors. Make sure to reach out to your neighbors and let them know if they have any noise complaints or issues to reach out to you directly. Give them your phone number and upon doing so, get them excited about your renovation! You’re ultimately adding value to their property as well, why not vocalize it.
- Make sure you have a good team around you. If it wasn’t for my father working on this project and guiding it, it wouldn’t have been successful. Have established contractors lined up if you do not know how to do the work.
- Know your numbers. Figure out your holding costs, absolutely bottom break even point. Labor and Materials, etc.
- Know what your time is worth. This goes hand in hand with knowing your numbers. You must factor in your time allocation to a project and put a dollar figure on it.
- Cut costs when possible. For example, getting your real estate license can help you negotiate a lower sales price or you can use the commission towards your renovation capital. When working with potential contractors, receive multiple bids. Instead of outsourcing some of the work, figure out what you can do in house. Painting is a quick and easy way to cut costs. If you want a quick tutorial on how to paint like a professional, just watch a few Youtube videos.
- Never build the nicest house on the block. While it’s great to produce a top product, make sure your price point is in line with other renovated buildings in the area. Two main reasons are, your property might not appraise at your asking price because not enough comps are close enough as well as your property might be sitting on the market for a longer period of time, costing you more money in the long run due to holding costs.
- Evaluate deals constantly. I evaluate deals on a daily basis (10+/ Day) even if I'm not ready to buy another unit. You will understand trends, know your market and be confident when deciding to lock in that contract.
If you want to know any of the materials I used, financials, contractors or have further interest in investing in Real Estate, feel free to contact me. Oh and if you read this far, thank you. We were under contract within 3 weeks and sold the property for full ask of $314,900.
For more tips and Real Estate Guidance You can follow my Real Estate Instagram account
@ Cashflow_Academy

Comments